Dutton's blog
I've now successfully moved two of my domains to Azure web hosting, I can't say it was a particularly quick process but it is relatively painless. The key is not to lose patience with the DNS updates as it can appear like nothing is working (all while your website is broken to the outside world) so I thought I'd document the moving of a third domain so you know what to expect. I use Fasthosts for all of my hosting needs, so my screenshots are from their domain management system, but I can't see why the same wouldn't work for other domain name providers that allow custom DNS.
Setting up the Windows Azure web site
OK, so first we need to set up an Azure web site for you to point your domain to, you can skip this if you've already got one.
- Head over to https://manage.windowsazure.com/ and login to your Azure Dashboard.
- Select the Web Sites option on the left hand bar, and if you haven't already got any websites set up you'll see something that looks like this.

- Select Create a Website (or click the big plus icon at the bottom of the page if you already have websites set up) and you'll see this.
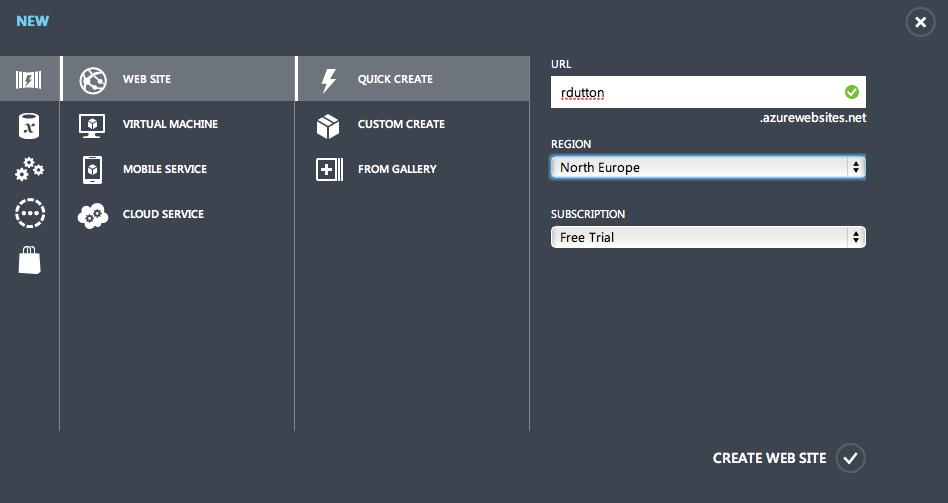
- From here you can create all sorts of websites from the gallery or a simple website via the Quick Create link. For the purposes of this tutorial, I'm going to use Quick Create to get something that I can use to test my domain forwarding is working. So choose a name (this will be your azurewebsites.net domain and so needs to be unique, the green tick will indicate when you've picked one that Microsoft is happy with, but don't get too hung up on it as no-one will see it. We're going to set up your own domain to forward to this later.
- Click Create Website and you'll be taken back to the dashboard with your new website listed.
- The Status column will show "Creating" for a while (mine took about 20 seconds at 1400BST on a Saturday) and then will look like this.

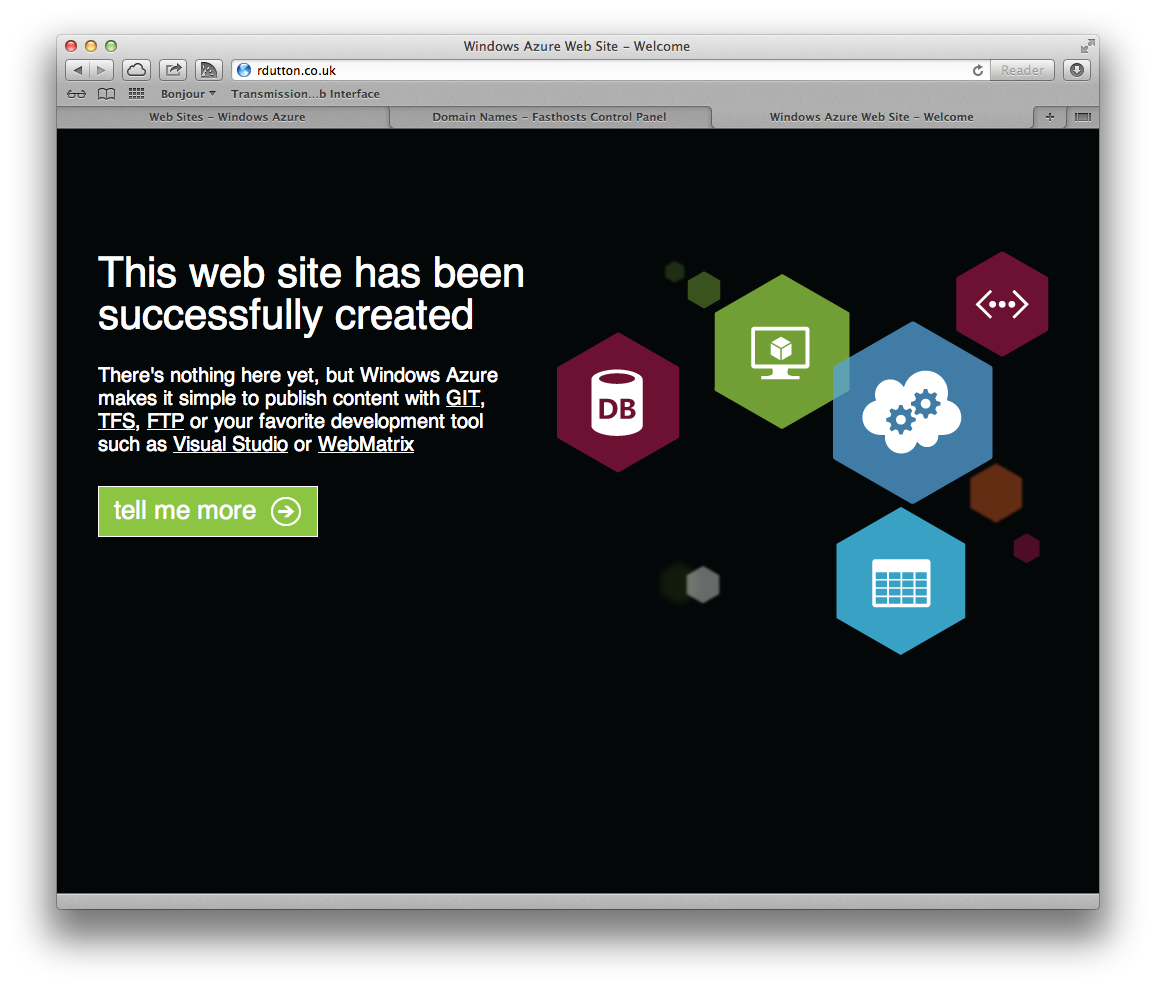
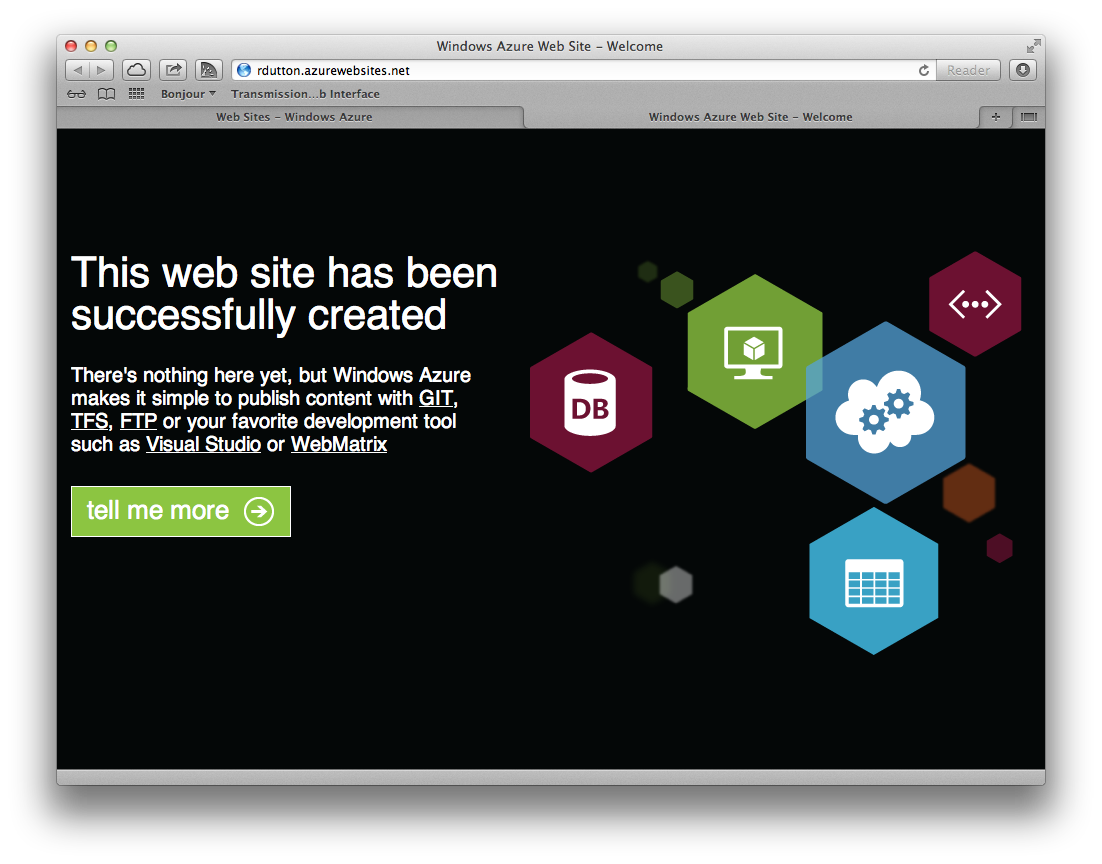
- Now, if I go to my new domain (rdutton.azurewebsites.net), I'll be greeted by this to confirm that my Azure Website is up and running.
Configuring my own domain to use with Windows Azure websites
- My domain 'rdutton.co.uk', is hosted over at Fasthosts, but I want to use it for my azure website. At the time of writing, Windows Azure doesn't support hosting domains so we need to do some poking about in my DNS records over in my Fasthosts Control Panel.
- Go to https://www.fasthosts.co.uk/login/ and log into your control panel. If you've been following along from above, leave the Azure Dashboard open, you'll be needing that again soon.
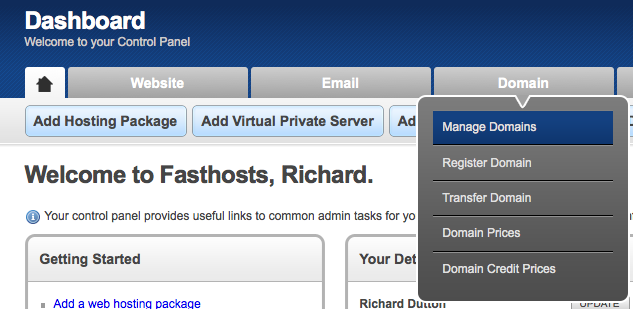
- From the Domain tab, select Manage Domains.
- And click on the DNS icon for the domain you want to change.

- From here you'll be taken to the Advanced DNS window, in this screenshot my domain is currently just set to the default Fasthosts settings.
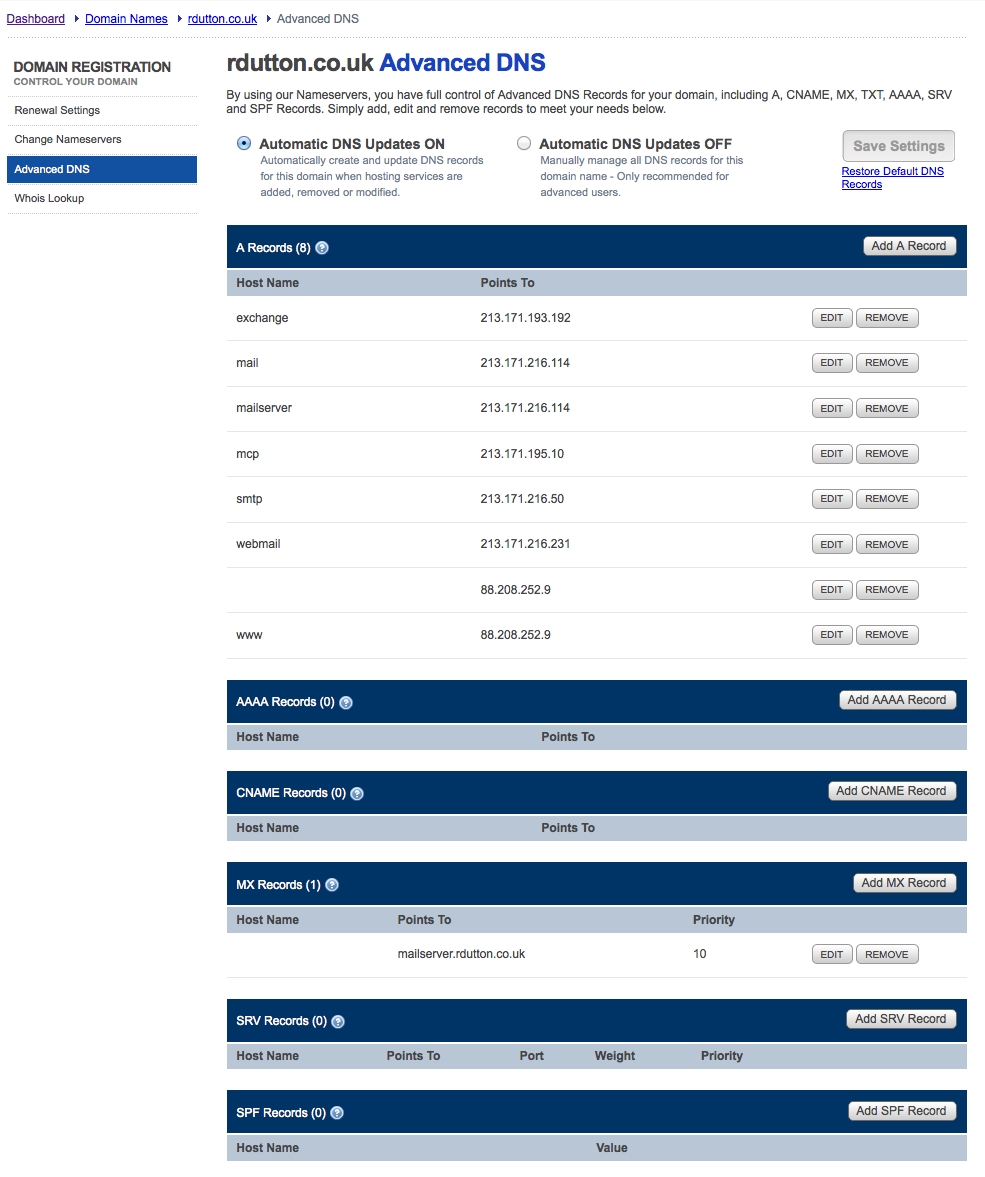
- Go through and click Remove on all of the A Records and CNAME Records listed.
- Keeping the Fasthosts page open, go back to the Azure dashboard and from the Web Sites list, click on the name of the website you want to edit.
- Before you can use your own domain in Windows Azure, you need to change the scaling mode of your Azure website.
NB: This will change the Web Site Mode from Free so you will be charged for usage once you do this. Please consult the Azure price lists for more information.
- Select the Scale tab.
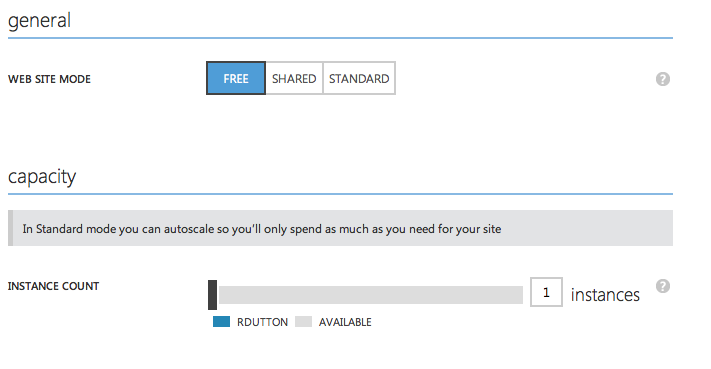
- Change the Web Site Mode to Shared.

- Click Save and (you will be prompted with a warning about charging, confirm you are happy with this).
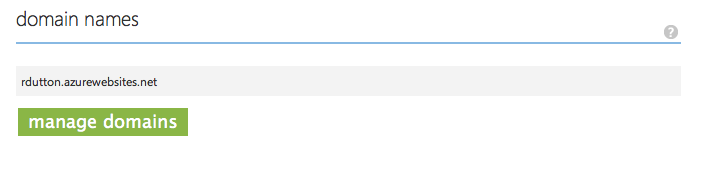
- Select the Configure tab and scroll down to Domain Names.
- Click on Manage domains.
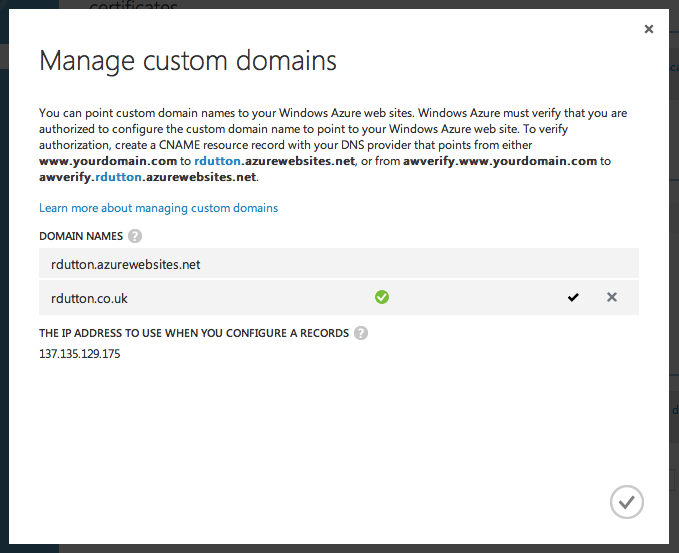
- This is where you will eventually configure the domain you want to point to your azure website but before you can do that, you need to configure some DNS!
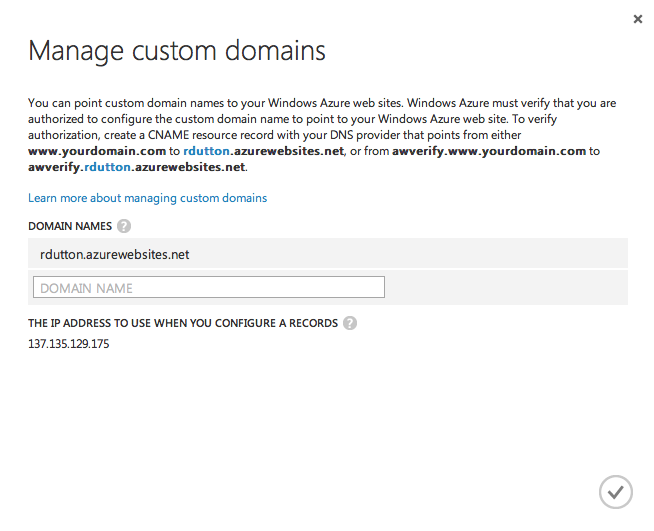
- Take a note of the IP address given on this window, in my case "137.135.129.175".
- On the Fasthosts dashboard for your domain, select Add CNAME Record and add and entry with a Host Name of "awverify.www" that points to "awverify.<your azurename>.azurewebsites.net". Click Save.
- Select Add CNAME Record again and add a further entry with a Host Name of "awverify" that points to "awverify.<your azurename>.azurewebsites.net" again, click Save.
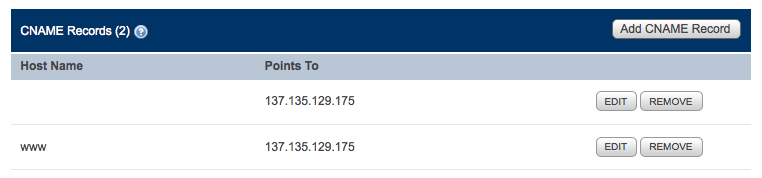
- You should then end up with CNAME records that look like this, but with your azure website address:
- Select Add A Record and add an entry with a blank Host Name that points to your Azure Web Site IP address, click Save.
- Add a further A Record with a Host Name of "www" pointing to the same IP, again click Save.
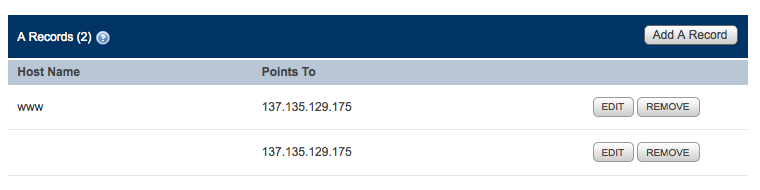
- You should have A Records that look like this, but again with your Azure IP:
- Now back at your Azure dashboard, enter your domain into the Manage custom domains window. If you're lucky you will get a green tick after a few seconds.
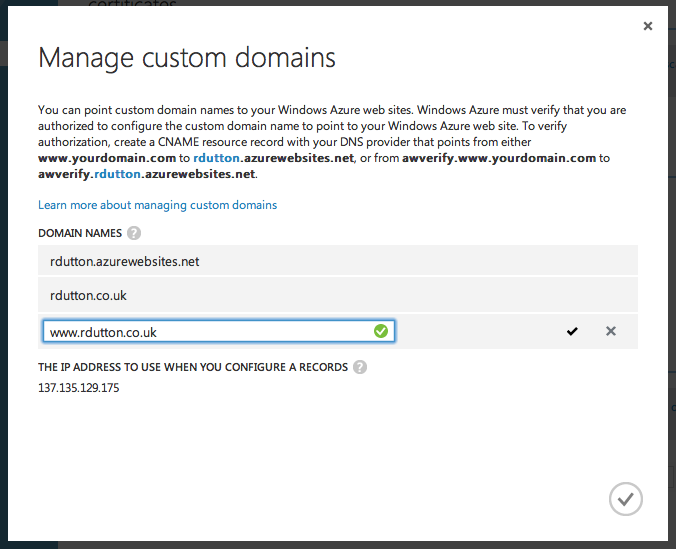
- Do the same thing for the "www" variant of your domain.
- However you may see a message like this.
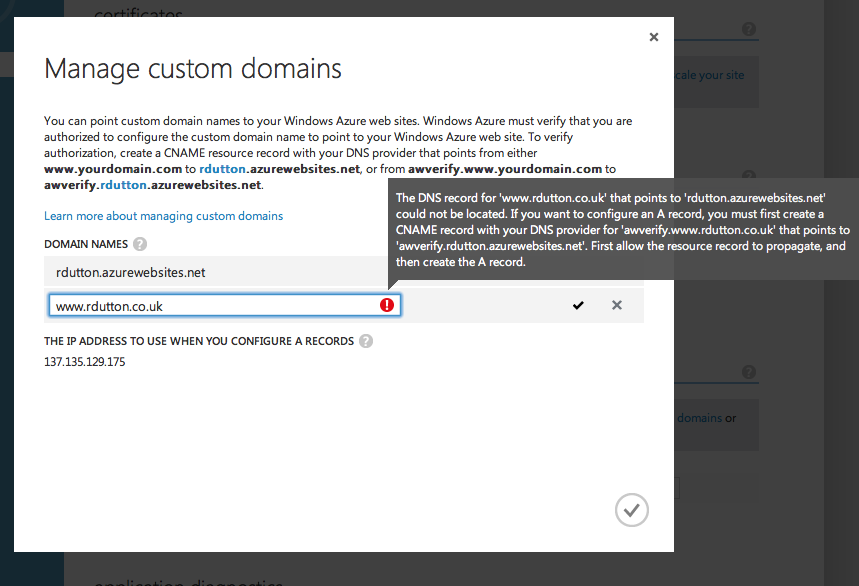
- If you do, just wait a few minutes and try again, in this example I entered my final A Record on the Fasthosts page at 1440BST on a Saturday afternoon and I didn't get a green tick until 1515BST. This is where previously I would often end up going back and re-entering CNAME records, resetting DNS, convinced that I had done something wrong only to just prolong the delay while the DNS update propagates. I found http://www.digwebinterface.com and http://www.viewdns.info useful tools to see if the DNS records have propagated.
- And that's it... Your domain should now be pointing to your Azure website.